Everything in knitting consists of two basic stitches, i.e., the knit stitch and the purl stitch. Each knit fabric you see around is a result of these two stitches and few other techniques. Most beginners’ knitters start by mastering stocking stitch and garter stitch, which normally involves working complete rows of knits and purl stitches.
Afterward, they learn how to alternate between knitting and purl stitches on the same row. Thus creating a rib stitch pattern, usually referred to as ribbing used for edges, cuffs, and hems. Let’s learn more about the results of knitting a kit one purl two patterns.
What Type Of Design Results From Knitting In A Knit One Purl Two Patterns?
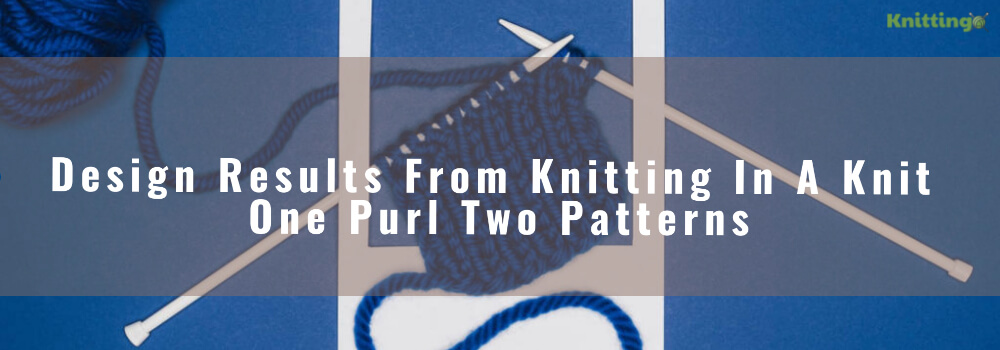
The knit one purl two patterns are 1×2 rib, normally suitable for hems, cuffs, and edges. It is a flat vertical line in a reverse stockinette stitch when used for decoration purposes.
How To Knit One Purl Two
Alternating complete rows of knitting and purl stitches make a well-known stockinette stitch. However, it’s possible to switch back and forth within the same row to generate several distinct patterns. With all the knit/purl stitch patterns, ribbing is the most widely used type. This is majorly due to its stretchiness and capacity to bounce back into place easily. As a result, it is used to make hems, cuffs, and necks for most sweaters.
So when you knit one purl two, alternating one knit stitch and two purl stitches, you will eventually create a stretchy 1×2 rib fabric. It remains flexible while keeping shape at the same time. To learn knitting rib stitch, cast on a uniform number of stitches, then start knitting a knit stitch first on each row. Work knit one stitch (k1), purl two stitches (p2) until the end of your row.
Check These Steps On How To Knit One Purl Two;
Step 1: Start with a regular knit stitch while the working yarn is at the back of your work and stitch it normally.
Step 2: Now, purl two stitches, but first, you need to bring the working yarn on the front side of your work. Bring the yarn across the needles to the front side.
Step 3: This means you have worked yarn front (yf), also known as yard forward (yfwd), or with the yarn in front (wyif). Move to the front side of your fabric now with your working yarn and proceed to make purl two in the next stitch as usual.
Step 4: Knit a stitch and take your working yarn across the needle. This is known as yarn back (yb) or with yarn in the back(wyib). Knit your next stitch. Repeat the same steps to create a 1×2 rib.
While knitting, you might have noticed that the working yarn is held at the back of your work if you knit stitches. However, if purling a stitch, the working yarn is always at the front of your fabric. When alternating between knit and purl stitches on the same row, you must ensure the yarn is in the correct position to work to the next stitch. When moving the yarn from the back to the front, or vice versa, the working yarn should go in the middle of the two needles, not over them.
How Can You Identify Rib Stitches?
When your rib knitting piece grows, the knit and the purl stitches will form explicated columns. Always remember, whichever row you’re on, the working yarn need to move to the front side of your fabric before purling, then take it back before doing a knit stitch. If you go wrong, look down the column or rib to ensure the knit stitch V shape and the purl bumps are in the right position. Here is how you identify the row, knit one purl one ribbing;
One Knit Stitch
Every knit stitch forms a V-shape, which is eminent on the rib fabric. When you are unsure which stitch you are working next, check whether the stitch on the row below is a knit (v- shape) or purl (a wavy bump).
One Purl Stitch
When knitting, you will notice the purl bumps. Whenever the fabric is off the needles, they sink in, making the stitches more eminent on the reverse.
One Rib Row
Every row of the rib in a fabric includes a mixture of knit and purl stitches. The knit stitches normally look more raised as compared to purl stitches. Whenever you need to count your fabric rows of rib, treat it like a stocking stitch and count the rows of V-shape on one end.
What Is A Knit One Purl One Stitch Called?
Knit one purl one stitch is generally referred to as a single rib or “knit one purl one.” Single rib pattern is usually a stretchy knitted piece suitable for hems, cuffs, etc. To make a single rib, you need to alternate one knit, one stitch, and one purl stitch to make a stretchy 1×1 rib fabric piece. Replicate the same up to the end of the row and continue doing so in the next row until you are done. In the end, the beautiful single rib piece will look perfect and flexible.
How To Switch From A Knit To A Purl Stitch In The Middle Of The Row
To generate a single rib, you need to switch from knitting to purling stitches in a row. Here is how you do it.
1. Each time you switch from a knit stitch to a purl stitch, keep the working yarn forward before moving to the purl stitch.
2. Likewise, each time you switch from a purl stitch to a knit stitch, hold the working yarn to the backside of your work before moving to the knit stitch.
N/B: Note that when you knit stitches, the working yarn is usually at the back of the work, but when you purl stitches, the working yarn is always at the front of the work.
What Is It Called When You Knit One Row And Purl The Next?
Knitters begin by learning the knit stitch, and when they master it, purl stitch learning begins. You will need to perfect knitting repeatedly on one row with the same stitch type before alternating the two. If you can knit one row and purl the next one, repeating the process progressively produces the most excellent pattern of all, known as stockinette stitch.
Nonetheless, stockinette or stocking stitch is the primary stitch that many knitting patterns don’t explain; they believe it’s already a crafter collection. Some season knitters are used to this kind of stitch and might be using it regularly. Meanwhile, you will learn that if the knit stitch is repeated on each row (or contrarily, when the purl stitch is repeated on each row), it generates a “garter stitch.”
What Is Knit Two Purls Two Called?
Knit 2 (k2) purl 2 (p2) is generally known as corded rib stitch, and it is warm and a great pattern to look at. Corded rib stitch is used in various projects and accessories for style and fashion in different sectors. On top of that, this smart pattern provides a firm texture with slight stretch. For better understanding, this is how it needs to be;
Knit two, purl two (k2, p 2) corded rib stitch
Cast on multiple of 4 stitches plus two more
Row 1(RS) knit two × purls two, knit two, then repeat from× to end
Row 2 purl two, knit two, purl two, then repeat from× to end.
To continue, repeat rows 1 and 2.
What Is The Easiest Knitting Stitch?
One of the easiest and most popular stitch patterns in knitted fabric is garter stitch. Either knitting or purling every row creates a garter stitch. Garter features horizontal ridges created by the tops of knit loops on each other row. Because the stitch lies flat and is reversible, it’s ideal for clothing such as blankets, scarves, washcloths, and bags. If you are new to garter stitch, always remember to count the total number of stitches after every row since you may realize to have created a new stitch accidentally.
Stockinette stitch is another basic stitch for beginners, and it’s created by alternating a knit row with a purl row. Other easiest knitting you can learn also includes; seed stitch, basketweave stitch, and linen stitch, among others, depending on your ability to learn and understand.
Can You Knit And Purl In The Same Row?
As it is possible for one to alternate knit and purl stitches on different rows, you can do the same in the same row to generate different patterns. The tricky part about this is remembering to move working yarn back and forth when knitting different stitches.
Should You Always Slip The First Stitch When Knitting?
Slipping stitches is done purlwise not unless the instructions say otherwise. Slipping the stitch as if to purl is the only way you can hold the correct leg facing forward in your knitting piece. It’s doesn’t matter if you are on the right or wrong side of your work.
Conclusion
Whether you’re a starter or a seasoned knitter, having a firm grasp on knit stitch and purl stitch is very important. Mastery of these stitches will expand your ability in knitting while giving you a chance to explore a variety of beautiful patterns. You will get used to alternating both stitches in the same row and different rows to create fabulous designs. Note that you need have patience and practice more but depending on your ability to learn, you will soon create all the desired patterns.

